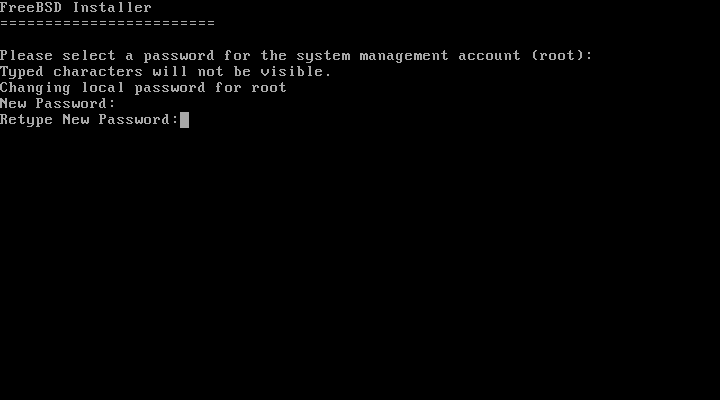
First, the root
password must be set. While entering the password, the
characters being typed are not displayed on the screen. After
the password has been entered, it must be entered again. This
helps prevent typing errors.
The next series of menus are used to determine the correct local time by selecting the geographic region, country, and time zone. Setting the time zone allows the system to automatically correct for regional time changes, such as daylight savings time, and perform other time zone related functions properly.
The example shown here is for a machine located in the mainland time zone of Spain, Europe. The selections will vary according to the geographical location.
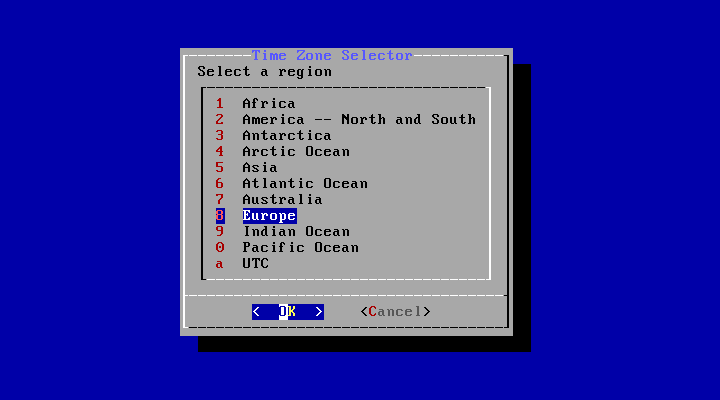
The appropriate region is selected using the arrow keys and then pressing Enter.
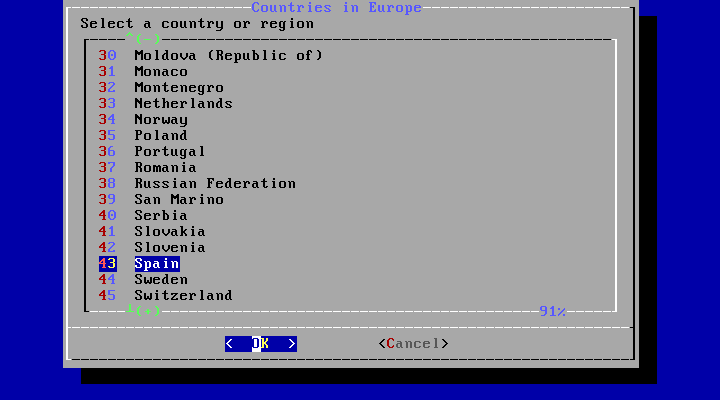
Select the appropriate country using the arrow keys and press Enter.
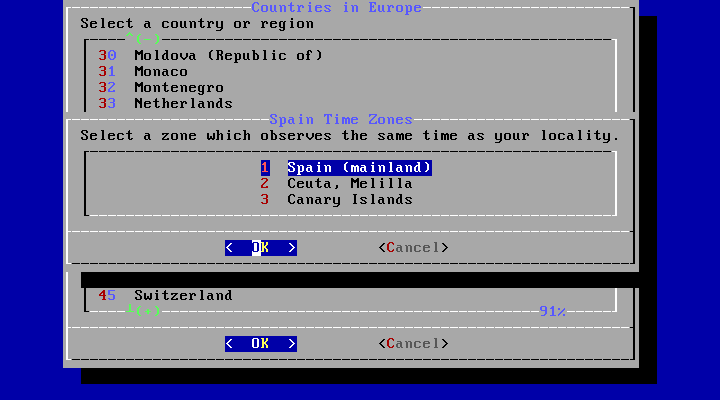
The appropriate time zone is selected using the arrow keys and pressing Enter.
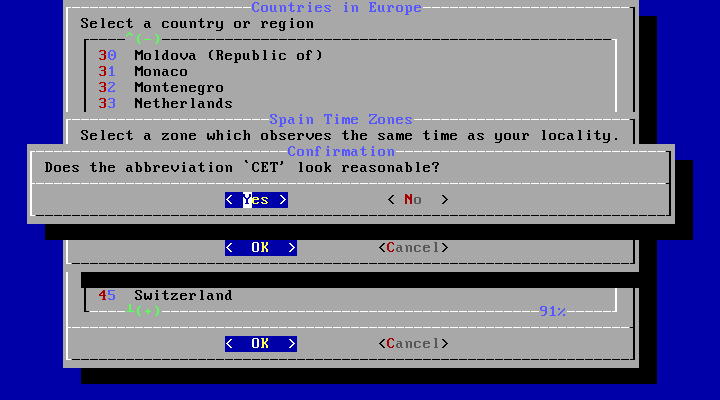
Confirm the abbreviation for the time zone is correct.
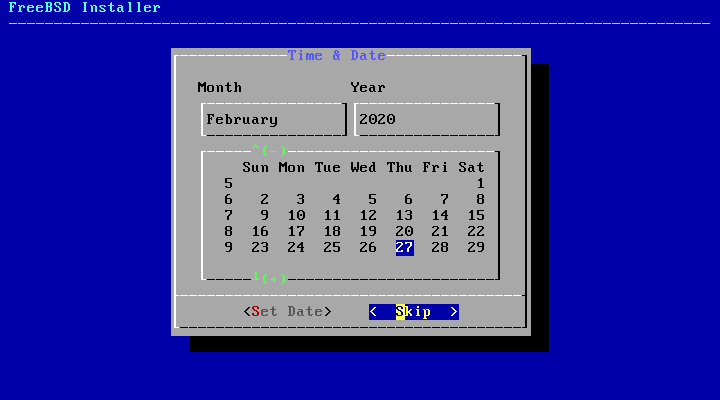
The appropriate date is selected using the arrow keys and then pressing . Otherwise, the date selection can be skipped by pressing .
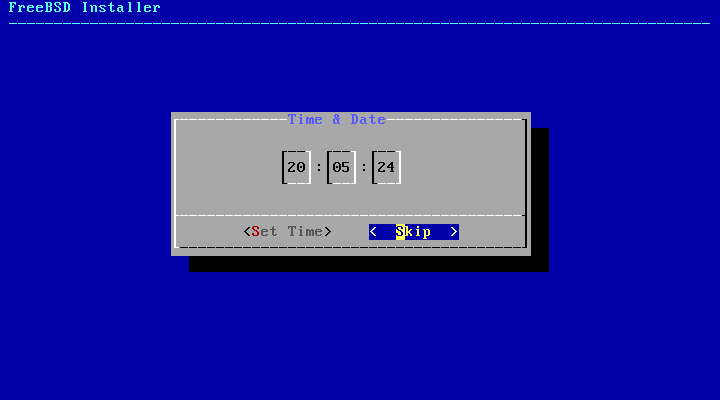
The appropriate time is selected using the arrow keys and then pressing . Otherwise, the time selection can be skipped by pressing .
The next menu is used to configure which system services will be started whenever the system boots. All of these services are optional. Only start the services that are needed for the system to function.
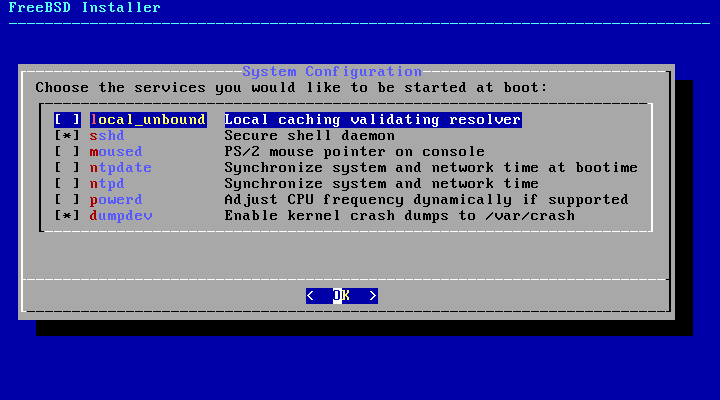
Here is a summary of the services which can be enabled in this menu:
local_unbound- Enable the DNS local unbound. It is necessary to keep in mind that this is the unbound of the base system and is only meant for use as a local caching forwarding resolver. If the objective is to set up a resolver for the entire network install dns/unbound.sshd- The Secure Shell (SSH) daemon is used to remotely access a system over an encrypted connection. Only enable this service if the system should be available for remote logins.moused- Enable this service if the mouse will be used from the command-line system console.ntpdate- Enable the automatic clock synchronization at boot time. The functionality of this program is now available in the ntpd(8) daemon. After a suitable period of mourning, the ntpdate(8) utility will be retired.ntpd- The Network Time Protocol (NTP) daemon for automatic clock synchronization. Enable this service if there is a Windows®, Kerberos, or LDAP server on the network.powerd- System power control utility for power control and energy saving.dumpdev- Enabling crash dumps is useful in debugging issues with the system, so users are encouraged to enable crash dumps.
The next menu is used to configure which security options will be enabled. All of these options are optional. But their use is encouraged.
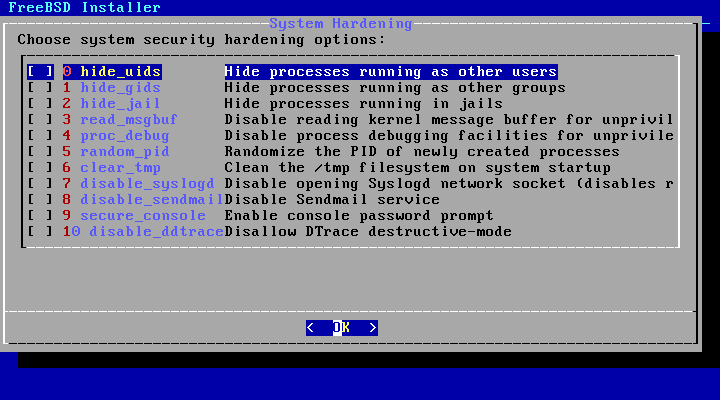
Here is a summary of the options which can be enabled in this menu:
hide_uids- Hide processes running as other users to prevent the unprivileged users to see other running processes in execution by other users (UID) preventing information leakage.hide_gids- Hide processes running as other groups to prevent the unprivileged users to see other running processes in execution by other groups (GID) preventing information leakage.hide_jail- Hide processes running in jails to prevent the unprivileged users to see processes running inside the jails.read_msgbuf- Disabling reading kernel message buffer for unprivileged users prevent from using dmesg(8) to view messages from the kernel's log buffer.proc_debug- Disabling process debugging facilities for unprivileged users disables a variety of unprivileged inter-process debugging services, including some procfs functionality, ptrace(), and ktrace(). Please note that this will also prevent debugging tools, for instance lldb(1), truss(1), procstat(1), as well as some built-in debugging facilities in certain scripting language like PHP, etc., from working for unprivileged users.random_pid- Randomize the PID of newly created processes.clear_tmp- Clean/tmpwhen the system starts up.disable_syslogd- Disable opening syslogd network socket. By default FreeBSD runs syslogd in a secure way with-s. That prevents the daemon from listening for incoming UDP requests at port 514. With this option enabled syslogd will run with the flag-sswhich prevents syslogd from opening any port. To get more information consult syslogd(8).disable_sendmail- Disable the sendmail mail transport agent.secure_console- When this option is enabled, the prompt requests therootpassword when entering single-user mode.disable_ddtrace- DTrace can run in a mode that will actually affect the running kernel. Destructive actions may not be used unless they have been explicitly enabled. To enable this option when using DTrace use-w. To get more information consult dtrace(1).
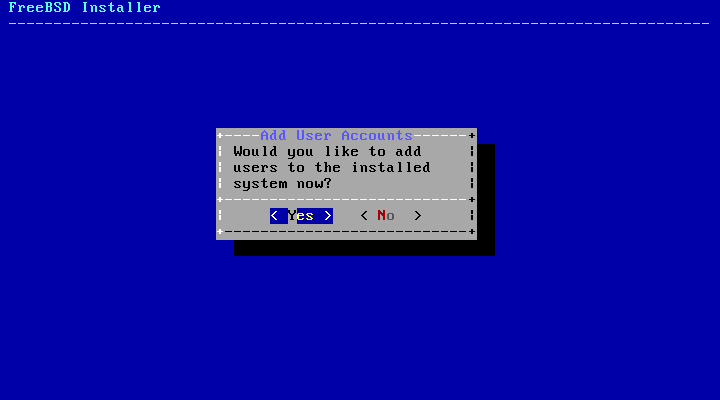
The next menu prompts to create at least one user account.
It is recommended to login to the system using a user account
rather than as root.
When logged in as root, there are essentially no
limits or protection on what can be done. Logging in as a
normal user is safer and more secure.
Select to add new users.
Follow the prompts and input the requested information for
the user account. The example shown in Figure 2.44, “Enter User Information” creates the asample user account.

Here is a summary of the information to input:
Username- The name the user will enter to log in. A common convention is to use the first letter of the first name combined with the last name, as long as each username is unique for the system. The username is case sensitive and should not contain any spaces.Full name- The user's full name. This can contain spaces and is used as a description for the user account.Uid- User ID. Typically, this is left blank so the system will assign a value.Login group- The user's group. Typically this is left blank to accept the default.Invite- Additional groups to which the user will be added as a member. If the user needs administrative access, typeuserinto other groups?wheelhere.Login class- Typically left blank for the default.Shell- Type in one of the listed values to set the interactive shell for the user. Refer to Section 3.9, “Shells” for more information about shells.Home directory- The user's home directory. The default is usually correct.Home directory permissions- Permissions on the user's home directory. The default is usually correct.Use password-based authentication?- Typicallyyesso that the user is prompted to input their password at login.Use an empty password?- Typicallynoas it is insecure to have a blank password.Use a random password?- Typicallynoso that the user can set their own password in the next prompt.Enter password- The password for this user. Characters typed will not show on the screen.Enter password again- The password must be typed again for verification.Lock out the account after creation?- Typicallynoso that the user can login.
After entering everything, a summary is shown for review.
If a mistake was made, enter no and try
again. If everything is correct, enter yes
to create the new user.
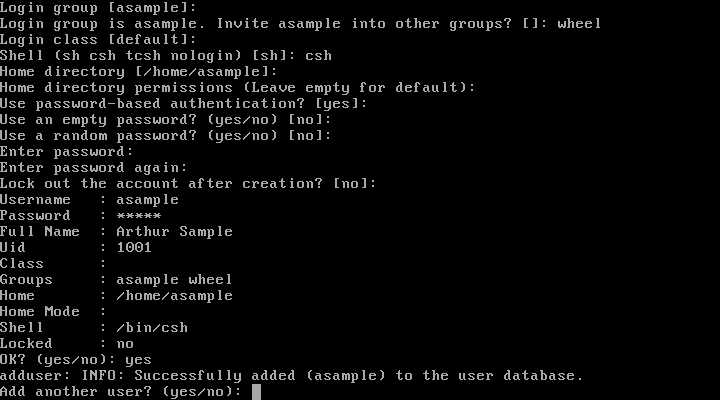
If there are more users to add, answer the Add
another user? question with
yes. Enter no to finish
adding users and continue the installation.
For more information on adding users and user management, see Section 3.3, “Users and Basic Account Management”.
After everything has been installed and configured, a final chance is provided to modify settings.
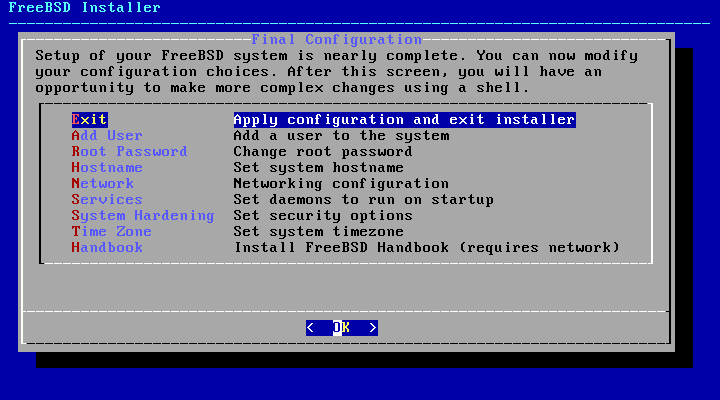
Use this menu to make any changes or do any additional configuration before completing the installation.
Add User- Described in Section 2.8.5, “Add Users”.Root Password- Described in Section 2.8.1, “Setting therootPassword”.Hostname- Described in Section 2.5.2, “Setting the Hostname”.Network- Described in Section 2.9.1, “Configuring Network Interfaces”.Services- Described in Section 2.8.3, “Enabling Services”.System Hardening- Described in Section 2.8.4, “Enabling Hardening Security Options”.Time Zone- Described in Section 2.8.2, “Setting the Time Zone”.Handbook- Download and install the FreeBSD Handbook.
After any final configuration is complete, select .
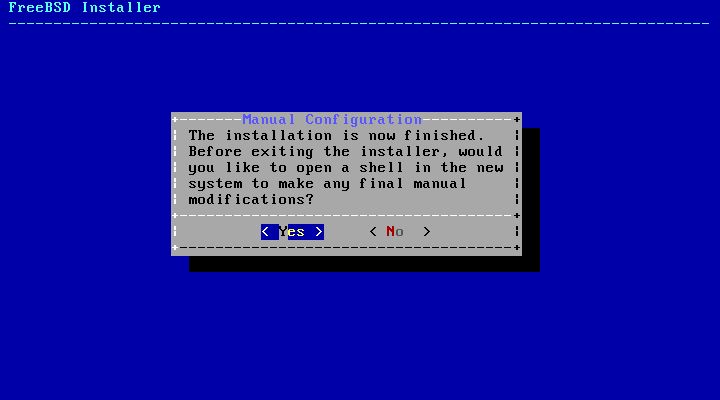
bsdinstall will prompt if there are any additional configuration that needs to be done before rebooting into the new system. Select to exit to a shell within the new system or to proceed to the last step of the installation.
If further configuration or special setup is needed, select to boot the install media into Live CD mode.
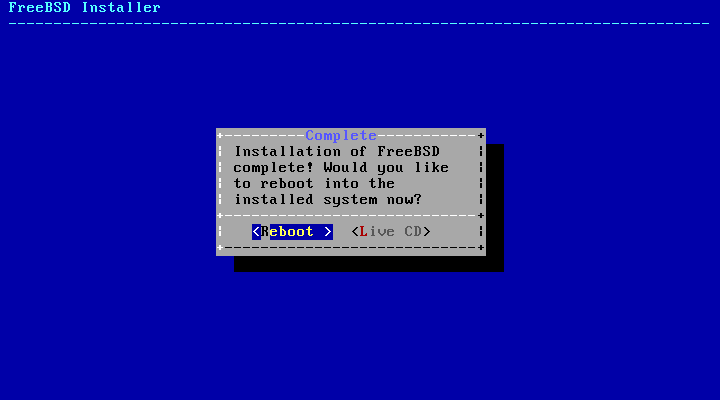
If the installation is complete, select to reboot the computer and start the new FreeBSD system. Do not forget to remove the FreeBSD install media or the computer may boot from it again.
As FreeBSD boots, informational messages are displayed.
After the system finishes booting, a login prompt is
displayed. At the login: prompt, enter the
username added during the installation. Avoid logging in as
root. Refer to
Section 3.3.1.3, “The Superuser Account” for instructions on how to
become the superuser when administrative access is
needed.
The messages that appeared during boot can be reviewed by
pressing Scroll-Lock to turn on the
scroll-back buffer. The PgUp,
PgDn, and arrow keys can be used to scroll
back through the messages. When finished, press
Scroll-Lock again to unlock the display and
return to the console. To review these messages once the
system has been up for some time, type less
/var/run/dmesg.boot from a command prompt. Press
q to return to the command line after
viewing.
If sshd was enabled in Figure 2.41, “Selecting Additional Services to Enable”, the first boot may be a bit slower as the system will generate the RSA and DSA keys. Subsequent boots will be faster. The fingerprints of the keys will be displayed, as seen in this example:
Generating public/private rsa1 key pair.
Your identification has been saved in /etc/ssh/ssh_host_key.
Your public key has been saved in /etc/ssh/ssh_host_key.pub.
The key fingerprint is:
10:a0:f5:af:93:ae:a3:1a:b2:bb:3c:35:d9:5a:b3:f3 root@machine3.example.com
The key's randomart image is:
+--[RSA1 1024]----+
|    o..          |
|   o . .         |
|  .   o          |
|       o         |
|    o   S        |
|   + + o         |
|o . + *          |
|o+ ..+ .         |
|==o..o+E         |
+-----------------+
Generating public/private dsa key pair.
Your identification has been saved in /etc/ssh/ssh_host_dsa_key.
Your public key has been saved in /etc/ssh/ssh_host_dsa_key.pub.
The key fingerprint is:
7e:1c:ce:dc:8a:3a:18:13:5b:34:b5:cf:d9:d1:47:b2 root@machine3.example.com
The key's randomart image is:
+--[ DSA 1024]----+
|       ..     . .|
|      o  .   . + |
|     . ..   . E .|
|    . .  o o . . |
|     +  S = .    |
|    +  . = o     |
|     +  . * .    |
|    . .  o .     |
|      .o. .      |
+-----------------+
Starting sshd.
Refer to Section 13.8, “OpenSSH” for more information about fingerprints and SSH.
FreeBSD does not install a graphical environment by default. Refer to Chapter 5, The X Window System for more information about installing and configuring a graphical window manager.
Proper shutdown of a FreeBSD computer helps protect data and
hardware from damage. Do not turn off the power
before the system has been properly shut down! If
the user is a member of the wheel group, become the
superuser by typing su at the command line
and entering the root password. Then, type
shutdown -p now and the system will shut
down cleanly, and if the hardware supports it, turn itself
off.